
How to Tie a Tie: A Step-by-Step Guide for a Polished Look
If there’s one skill every well-dressed individual should possess, it’s the art of tying a tie. Whether you’re gearing up for a formal event, a business meeting, or simply want to add a touch of sophistication to your everyday attire, knowing how to tie a tie is an invaluable skill. In this step-by-step guide, we’ll walk you through the process of tying a tie to achieve that polished and put-together look that commands attention.
Tying a tie might seem like a challenging task, especially if you’re new to wearing formal attire. However, with a bit of practice and guidance, you can easily master the art of tying a tie and achieve a polished and put-together look. Whether you’re preparing for a job interview, attending a wedding, or simply want to upgrade your style game, learning how to tie a tie is an essential skill. In this guide, we’ll take you through the step-by-step process of tying a tie, ensuring you’re ready to rock that sophisticated look whenever the occasion demands.
Introduction
Tying a tie might seem like a daunting task, but with a bit of practice, you’ll be able to execute various knot styles with ease. A well-tied tie not only complements your attire but also boosts your confidence.
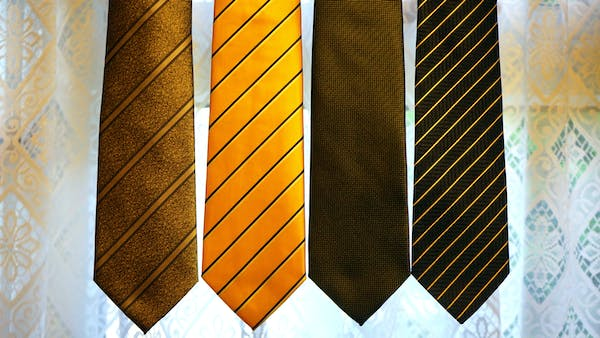
Choosing the Right Tie
Before you dive into tying a knot, it’s important to choose the right tie. Consider the occasion, your outfit’s color palette, and your personal style when selecting a tie. Silk ties are versatile and suitable for most occasions.
Preparing the Tie Knot
Start by draping the tie around your neck, with the wide end on your dominant side and the narrow end on the other. Adjust the lengths based on your height and tie length preference.
The Classic Four-in-Hand Knot
The Four-in-Hand knot is a timeless and simple knot, perfect for everyday wear. Cross the wide end over the narrow end, wrap it behind, and bring it over the front. Pass it through the loop and tighten.
The Elegant Half-Windsor Knot
For a slightly more formal look, opt for the Half-Windsor knot. Cross the wide end over the narrow end, wrap it behind, bring it up and through the loop. Then, pass it behind the wide end and thread it through the loop again.
The Formal Full-Windsor Knot
The Full-Windsor exudes confidence and formality. Cross the wide end over the narrow end, wrap it around and pull it up through the loop. Bring it over the front, thread it behind the loop, and pass through.
The Stylish Pratt Knot
The Pratt knot strikes a balance between symmetry and sophistication. Cross the wide end over the narrow end, loop it behind, bring it up, and thread it through the loop. Tighten and adjust as needed.
The Slim and Trendy Kelvin Knot
Ideal for narrow collars, the Kelvin knot is symmetrical and stylish. Cross the wide end horizontally behind the narrow end, bring it up, and thread it through the loop. Tighten and center the knot.
Securing the Tie Knot
Once you’ve tied the knot, hold the narrow end and slide the knot up to your collar. Tighten it gently by pulling the wide end. The knot should rest comfortably at the center of your collar.
Adjusting for Length and Symmetry
Ensure the tie’s tip hits right at your belt line. If the length is correct but the knot is lopsided, hold the narrow end and push the knot with your other hand to straighten it.
Pairing Ties with Different Collar Styles
Different collar styles call for specific tie knots. For spread collars, opt for larger knots like the Windsor. For narrow collars, go for the Four-in-Hand or Kelvin knots.
Matching Ties with Outfits
Consider the color and pattern of your tie in relation to your outfit. A patterned tie can add a pop of personality, while a solid tie complements a busy shirt.
Caring for Your Ties
Hang your ties to maintain their shape and avoid wrinkles. Untying the knot after each wear prevents permanent creases. Gently spot clean stains with a mild detergent.
Troubleshooting: Fixing Common Tie Knot Issues
If your tie is too short, start over with a longer end. If the knot is uneven, hold the narrow end and adjust the knot. Practice makes perfect!

Conclusion
Mastering the art of tying a tie opens up a world of sartorial possibilities. With a variety of knots at your disposal, you can effortlessly adapt your look to any occasion. Remember, practice leads to proficiency.